Sun Java Communications Suiteインストールメモ
最近、ORACLEに買収されてしまったSunですが、昔からサーバ系のソフトウェアを無料で提供しており、Sun Java Communications Suiteもその一つです。このソフトでは、メールサーバ、インスタントメッセージング、カレンダサーバ等のグループウェア的なツールが一式入っています。
最新のはバージョン7のようですが、ここではバージョン6をインストールしたときのインストールメモを紹介します。
●Sun Java Communications Suiteのダウンロード
下記のファイルをダウンロードしてください。
(Communications Suite)
(WebServer7.0)
●WebServer7.0のインストール
・ダウンロードしたファイルを解凍
・GUIのインストーラーを起動
# ./setup
(インストールの詳細は省略)
・管理サーバの起動
# cd /opt/webserver7/admin-server/bin
# ./startserv
Sun Java System Web Server 7.0U3 B06/16/2008 10:24
info: CORE3016: daemon is running as super-user
info: CORE5076: Using [Java HotSpot(TM) Server VM, Version 1.5.0_15] from [Sun Microsystems Inc.]
info: WEB0100: Loading web module in virtual server [admin-server] at [/admingui]
info: WEB0100: Loading web module in virtual server [admin-server] at [/jmxconnector]
info: HTTP3072: admin-ssl-port: https://server-1:8989 ready to accept requests
info: CORE3274: successful server startup
・管理サーバーにアクセス
https://server-1:8989
●Application Server 9.1 Update 1 with HADBのインストール
インストールガイド
http://docs.sun.com/app/docs/doc/820-3797/genoc?a=view
・インストーラー実行
bash-3.00$ export DISPLAY=192.168.0.2:0 ※クライアント(Xサーバ)のIPアドレス
bash-3.00$ ./sjsas_ee-9_1_01-solaris-i586-ml.bin
X11 サーバー '192.168.0.2:0' に接続しています。
・GUIにてインストール
以下、設定例。

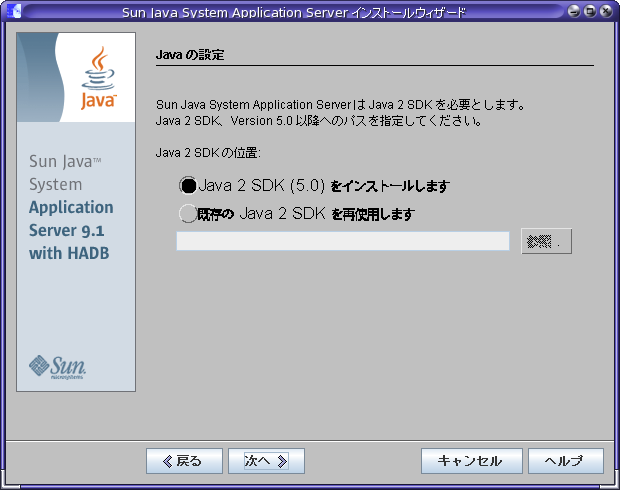
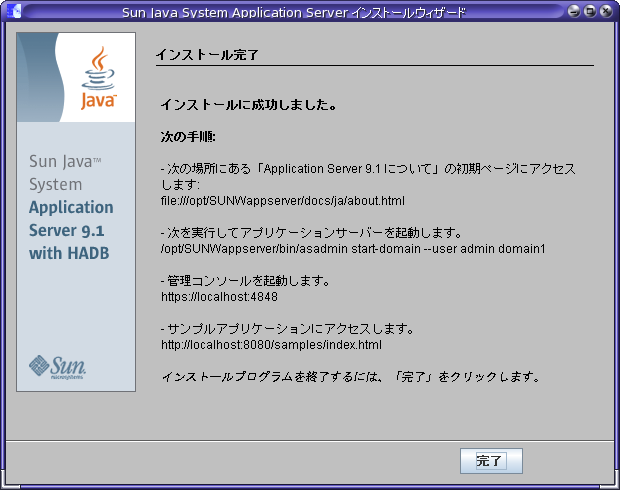
これで、/opt/SUNWappserverにインストールされました。
・Application Serverの管理URL
https://localhost:3737/
(WebServer設定)
・サーバーのルートディレクトリ:/opt/webserver7
・設定のルートディレクトリ:/opt/webserver7
・サーバーインスタンス識別子:comm-express
・仮想サーバー識別子:https-comm-express
・HTTPポート:9090
(管理インスタンス設定)
・管理サーバーポート:8989
・管理者のユーザID:admin
・管理者のパスワード:
・セキュリティ保護された~:チェック
(Webメールサーバー設定)
・Webメールサーバーのホスト名:192.168.0.1
・Webメールサーバーのポート番号:8990
※Communications Express 7.0でデフォルトポートが8990に変更になった。
・SSLの有効化
# vi /opt/sun/comms/ce/WEB-INF/config/uwcauth.properties
uwcauth.ssl.enabled=true
uwcauth.https.port=9090
・Messenger Express の local.webmail.sso.uwcport パラメータ値に、Communications Express が配備される Web Server の SSL ポート番号を設定。
# /opt/sun/comms/messaging/sbin/configutil -o local.webmail.sso.uwcport -v 9090
●システムブート時の実行例
・Cacaoの起動
# /opt/dsee6/cacao_2/usr/lib/cacao/bin/cacaoadm start
・ADSの起動
# /opt/ds6/bin/dsadm start /opt/var/dscc6/dcc/ads
・DSCCの起動
# cd /opt/SUNWappserver/bin
# ./asadmin start-domain --domaindir /opt/domain-root --user boss dscc
・インスタンスの起動
# /opt/ds6/bin/dsadm start /opt/kirihari.net/
・MessagingServerの起動
# /opt/sun/comms/messaging/sbin/start-msg
【参考1】メール保管場所の移動(MessagingServer)
・パーティションの追加(tt-data)
# cd /opt/sun/comms/messaging/bin
# ./configutil -o store.partition.tt-data.path -v /tt-data/tt-data/mailbox/
・構成反映のためリスタート
# ./stop-msg
# ./start-msg
・メールボックスを新しいパーティションに移動する(adminユーザをttdataへ移動)
# ./mboxutil -r user/admin/INBOX user/admin/INBOX ttdata
・プライマリパーティションの変更
# ./configutil -o store.partition.primary.path -v /tt-data/tt-data/mailbox/
【参考2】メールボックスのバックアップ
・全メールボックスのバックアップ
# cd /opt/sun/comms/messaging/bin
# ./imsbackup -f- /primary/user > /tt-data/tt-data/backup/mailbox/all_message_store.bak
・メールボックスのリストア(adminユーザ)
# ./imsrestore -f /tt-data/tt-data/backup/mailbox/all_message_store.bak /primary
/admin
--------------------------------------------
Tape Version : 2
Backup Date : 2008/09/27 01:50:29
Message Store : kirihari.net
Block factor : 20
--------------------------------------------
最新のはバージョン7のようですが、ここではバージョン6をインストールしたときのインストールメモを紹介します。
●Sun Java Communications Suiteのダウンロード
下記のファイルをダウンロードしてください。
(Communications Suite)
- DSEE.6.3.Solaris10-X86_AMD64-full.tar.gz
- SunJava_CommsInstaller_Suite6_solaris-x86.zip
- java_es-5u1-ga-solaris-x86.zip
- sjsas_ee-9_1_01-solaris-i586-ml.bin
(WebServer7.0)
- sjsws-7_0u3-solaris-amd64.tar.gz
●WebServer7.0のインストール
・ダウンロードしたファイルを解凍
・GUIのインストーラーを起動
# ./setup
(インストールの詳細は省略)
・管理サーバの起動
# cd /opt/webserver7/admin-server/bin
# ./startserv
Sun Java System Web Server 7.0U3 B06/16/2008 10:24
info: CORE3016: daemon is running as super-user
info: CORE5076: Using [Java HotSpot(TM) Server VM, Version 1.5.0_15] from [Sun Microsystems Inc.]
info: WEB0100: Loading web module in virtual server [admin-server] at [/admingui]
info: WEB0100: Loading web module in virtual server [admin-server] at [/jmxconnector]
info: HTTP3072: admin-ssl-port: https://server-1:8989 ready to accept requests
info: CORE3274: successful server startup
・管理サーバーにアクセス
https://server-1:8989
●Application Server 9.1 Update 1 with HADBのインストール
インストールガイド
http://docs.sun.com/app/docs/doc/820-3797/genoc?a=view
・インストーラー実行
bash-3.00$ export DISPLAY=192.168.0.2:0 ※クライアント(Xサーバ)のIPアドレス
bash-3.00$ ./sjsas_ee-9_1_01-solaris-i586-ml.bin
X11 サーバー '192.168.0.2:0' に接続しています。
・GUIにてインストール
以下、設定例。
これで、/opt/SUNWappserverにインストールされました。
・Application Serverの管理URL
https://localhost:3737/
●Directory Server 6.3インストール
インストールガイド
http://docs.sun.com/app/docs/doc/820-5398?l=ja
1.DSEE.6.3.Solaris10-X86_AMD64-full.tar.gzを解凍
2.ディレクトリ移動
# cd DSEE_ZIP_Distribution
3.インストーラ実行
# ./dsee_deploy install -i /opt
ここでは、/optをインストール先に設定
・ライセンス確認
Do you accept the license terms ? <yes/no> : yes
・インストール完了
(省略)
Configuring Cacao at /opt/dsee6/cacao_2
Setting Cacao parameter jdmk-home with default value [/opt/dsee6/private]
Setting Cacao parameter java-home with default value [/opt/jre]
Setting Cacao parameter nss-lib-home with default value [/opt/dsee6/private/lib]
Setting Cacao parameter nss-tools-home with default value [/opt/dsee6/bin]
Registering DSCC agent into cacao
Starting Cacao if necessary
Registering JESMF agent into Cacao
Making a copy of dsee_deploy
Making a copy of listrunnings
You can now start your Directory Server Instances
You can now start your Directory Proxy Server Instances
4.WebからDirectoryServerを管理するための設定
マニュアル
http://docs.sun.com/app/docs/doc/820-5398/install-dscc-zip?l=ja&a=view
・DSCCレジストリの初期化
# ./dsccsetup ads-create
Choose password for Directory Service Manager:
Confirm password for Directory Service Manager:
Confirm password for Directory Service Manager: Creating DSCC registry...
DSCC Registry has been created successfully
※入力するパスワードによっては、エラーで止まる。
Choose password for Directory Service Manager:
Confirm password for Directory Service Manager:
Creating DSCC registry...
rc = 11
/opt/ds6/bin/dsadm exited with unexpected error code 11
com.sun.directory.common.slapx.AdmCmdErrorException: /opt/ds6/bin/dsadm create -
p 3998 -P 3999 --pwd-file /var/tmp/ads47762.tmp /opt/var/dscc6/dcc/ads
at com.sun.directory.common.slapx.AdmCmd.run(AdmCmd.java:84)
at com.sun.directory.common.slapx.AdmCmd.run(AdmCmd.java:51)
at com.sun.directory.dcc.ads.ADSInstall.createADSInstance(ADSInstall.jav
a:628)
at com.sun.directory.dcc.ads.ADSInstall.create(ADSInstall.java:249)
at com.sun.directory.dcc.cli.setup.CmdAdsCreate.performCreate(CmdAdsCrea
te.java:129)
at com.sun.directory.dcc.cli.setup.CmdAdsCreate.perform(CmdAdsCreate.jav
a:59)
at com.sun.directory.clip.ClipSubcommand.execute(ClipSubcommand.java:89)
at com.sun.directory.clip.FriendlySubcommand.execute(FriendlySubcommand.
java:55)
at com.sun.directory.clip.ClipParser.execute(ClipParser.java:196)
at com.sun.directory.dcc.cli.setup.SetupMain.main(SetupMain.java:30)
Sofware installation is probably incomplete or corrupted
・アプリケーションサーバーインスタンスを作成
# mkdir /opt/domain-root
# export AS_DOMAINS_ROOT=/opt/domain-root
# cd /opt/SUNWappserver
# ./asadmin create-domain --domaindir /opt/domain-root --adminport 3737 --adminuser boss dscc
管理パスワードを入力してください>
管理パスワードをもう一度入力してください>
マスターパスワードを入力してください [デフォルトを使用する場合は Enter キー]:>
マスターパスワードを再度入力してください [デフォルトを使用する場合は Enter キー]:>
Admin のポート 3737 を使用しています。
HTTP Instance のデフォルトポート 8080 を使用しています。
JMS のデフォルトポート 7676 を使用しています。
IIOP のデフォルトポート 3700 を使用しています。
HTTP_SSL のデフォルトポート 8181 を使用しています。
IIOP_SSL のデフォルトポート 3820 を使用しています。
IIOP_MUTUALAUTH のデフォルトポート 3920 を使用しています。
JMX_ADMIN のデフォルトポート 8686 を使用しています。
設定ファイルの変数 AS_ADMIN_PROFILE による の指定どおりにプロファイル enterpriseを使用してドメインを作成しています。
指定されたロケール [ja_JP] のファイルが [/opt/SUNWappserver/lib/install/templates/locales/ja_JP/index.html] に見つかりませんでした。デフォルト (en_US) の index.html を使用します。
使用するセキュリティーストア: NSS
ドメイン dscc が作成されました。
・server.policy ファイルを編集
# vi /opt/domain-root/dscc/config/server.policy
次の文を、ファイルの末尾に追加。
// Permissions for Directory Service Control Center
grant codeBase "file:${com.sun.aas.instanceRoot}/applications/j2ee-modules/dscc/-"
{
permission java.security.AllPermission;
};
・アプリケーションサーバーインスタンスに WARファイルを配備
# ./asadmin start-domain --domaindir /opt/domain-root --user boss dscc
ドメイン dscc を起動しています。お待ちください。
ログは /opt/domain-root/dscc/logs/server.log にリダイレクトされます。
管理パスワードを入力してください>
マスターパスワードを入力してください>
出力を /opt/domain-root/dscc/logs/server.log にリダイレクトしています
ドメイン dscc が起動しました。
ドメイン [dscc] はその設定で [Sun Java System Application Server 9.1_01 (build l
ocal)] を実行しています。ログは [/opt/domain-root] にあります。
管理コンソールは [https://localhost:3737] で使用できます。
"asadmin" コマンドにも同じポート [3737] を使用します。
ユーザーの Web アプリケーションは次の URL で使用できます:
[http://localhost:8080 https://localhost:8181 ]。
次の web-contexts を使用できます:
[/web1 /__wstx-services ]。
標準の JMX クライアント (JConsole など) はドメイン管理のために JMXServiceURL:
[service:jmx:rmi:///jndi/rmi://server-1:8686/jmxrmi] に接続できます。
ドメインは少なくとも次のポートで接続を待機しています:
[8080 8181 3737 3700 3820 3920 8686 ]。
ドメインはアプリケーションサーバークラスタおよびその他のスタンドアロンインスタン
スをサポートします。
# cp /opt/var/dscc6/dscc.war /opt/domain-root/dscc/autodeploy/
・DSCCにアクセス
アプリケーションサーバーの設定に応じて、http://hostname:8080/dscc または
https://hostname:8181/dsccにアクセス。

●Communication Suite 6のインストール
・解凍
# unzip SunJava_CommsInstaller_Suite6_solaris-x86.zip
・インストーラー実行
# ./commpkg install
-- LOGFILE: /tmp/CommsInstaller_20080920012702.log
CommsInstaller version 6.0-0.05 built on Wed Jul 9 22:15:55 PDT 2008
Welcome to the Communications Services Products Installer
This program will install Communications Services Products
on your computer. Do note that the installer lays down the
bits, but does not do configuration. Separate configuration
steps for each individual product will be required.
・ライセンス確認
Copyright 2008 Sun Microsystems, Inc. All rights reserved.
Use is subject to license terms.
Before you install this product, you must read and accept the
entire Software License Agreement under which this product is
licensed for your use.
The Software License Agreement will now be displayed.
Do you want to continue ? [yes] : yes
~ライセンス内容~
Enter s to skip, or Enter c to continue [c] : s
Do you agree to the license terms ? [No] : yes
・インストール場所の指定
=-=-=-=-=-=-=-=-=-=-=-=-=-=-=-=-=-=-=-=-=-=-=-=-=-=-=-=-=-=-=-=
Specify Install Location
This program will extract the server files and install them
into a directory you specify. That directory is called the
INSTALLROOT in the product documentation and will contain
the server programs.
To accept the default shown in brackets, press the Enter key.
Install location [/opt/sun/comms]: (デフォルトのまま)
・インストールする製品の選択
-=-=-=-=-=-=-=-=-=-=-=-=-=-=-=-=-=-=-=-=-=-=-=-=-=-=-=-=-=-=-=
Product Selection:
Shared Components (not shown) will be installed as required.
you will be prompted later if Shared Components need to be upgraded.
OS patches (not shown) will be installed as required.
Communication Services Products:
Item Description
---- -----------
1 Messaging Server 7.0 (7.0-0.04)
2 Messaging Server (64bit) 7.0 (7.0-0.04)
3 Comms DSsetup 6.4 (6.4-2.01)
4 Comms Delegated Administrator 6.4 (6.4-2.05)
5 Calendar Server 6.3 (6.3-9.01)
6 Instant Messaging 7.3 (7.3-03.09)
7 Communications Express 6.3 (6.3-8.01)
8 Messaging Server Sun Cluster HA agent 7.0 (7.0-0.03)
9 Calendar Server Sun Cluster HA agent 6.3 (6.3-1.01)
10 Instant Messaging Sun Cluster HA agent 7.3 (7.3-01.02)
11 Convergence 1.0 (1.0-0.44)
Enter the items you wish to install. Enter q to quit.
Prefix an item with ~ to indicate you only want
to install shared component dependencies of that product
You can enter multiple items using commas to separate them.
For example: 1,2
Please select the products you wish to install [1, 2, 3, 4, 5, 6, 7, 8, 9, 10, 11]: (デフォルトのまま)
・パッケージのアップグレード確認(NSS/NSPR/JSS)
Generating list of things to install...
Checking for Shared Component Upgrade Requirements...
Shared component NSS/NSPR/JSS has a different pkg version installed
Description: Network Security Services,Netscape Portable Runtime
Current pkg Version (SUNWjss): 4.0,REV=2004.11.05.03.05
To be installed pkg version (SUNWjss): 4.2.4,REV=2006.11.16.21.41
Product Version: 4.2.6
Note that changing pkg versions is irreversible
On the other hand, if you do not change it,
some products may not work properly
An alternative is to start over and do a multi-install using --altroot
Do you wish to change pkg versions for NSS/NSPR/JSS [n] : yes
Shared component Message Queue has a different pkg version installed
Description: Message Queue
Current pkg Version (SUNWiqr): 3.7,REV=2006.06.18.23.02
To be installed pkg version (SUNWiqr): 4.1,REV=2007.07.26.11.39
Product Version: 4.1
Note that changing pkg versions is irreversible
On the other hand, if you do not change it,
some products may not work properly
An alternative is to start over and do a multi-install using --altroot
Do you wish to change pkg versions for Message Queue [n] : yes
Service Tags has a different pkg version installed
Description: Service Tags
Current pkg Version (SUNWservicetagr): 1.0,REV=2007.05.21.20.36
To be installed pkg version (SUNWservicetagr): 1.1.4,REV=2008.03.21.07.56
Product Version: 1.1.4
Note that changing pkg versions is irreversible
Do you wish to change pkg versions for Service Tags [n] : yes
(省略)
=-=-=-=-=-=-=-=-=-=-=-=-=-=-=-=-=-=-=-=-=-=-=-=-=-=-=-=-=-=-=-=
NOTICE: To undo the installation, run the commands in:
/var/opt/CommsInstaller/logs/undoCommsInstall_20080920012702
NOTICE: silent file created in:
/var/opt/CommsInstaller/logs/silent_CommsInstaller_20080920012702
NOTICE: LOGFILE created in:
/var/opt/CommsInstaller/logs/CommsInstaller_20080920012702.log
There were 1 Warning(s). Please consult the log file
#
●Communications Suite用のDirectoryServerの設定
インストールガイド
http://docs.sun.com/app/docs/doc/820-5398?l=ja
1.DSEE.6.3.Solaris10-X86_AMD64-full.tar.gzを解凍
2.ディレクトリ移動
# cd DSEE_ZIP_Distribution
3.インストーラ実行
# ./dsee_deploy install -i /opt
ここでは、/optをインストール先に設定
・ライセンス確認
Do you accept the license terms ? <yes/no> : yes
・インストール完了
(省略)
Configuring Cacao at /opt/dsee6/cacao_2
Setting Cacao parameter jdmk-home with default value [/opt/dsee6/private]
Setting Cacao parameter java-home with default value [/opt/jre]
Setting Cacao parameter nss-lib-home with default value [/opt/dsee6/private/lib]
Setting Cacao parameter nss-tools-home with default value [/opt/dsee6/bin]
Registering DSCC agent into cacao
Starting Cacao if necessary
Registering JESMF agent into Cacao
Making a copy of dsee_deploy
Making a copy of listrunnings
You can now start your Directory Server Instances
You can now start your Directory Proxy Server Instances
4.WebからDirectoryServerを管理するための設定
マニュアル
http://docs.sun.com/app/docs/doc/820-5398/install-dscc-zip?l=ja&a=view
・DSCCレジストリの初期化
# ./dsccsetup ads-create
Choose password for Directory Service Manager:
Confirm password for Directory Service Manager:
Confirm password for Directory Service Manager: Creating DSCC registry...
DSCC Registry has been created successfully
※入力するパスワードによっては、エラーで止まる。
Choose password for Directory Service Manager:
Confirm password for Directory Service Manager:
Creating DSCC registry...
rc = 11
/opt/ds6/bin/dsadm exited with unexpected error code 11
com.sun.directory.common.slapx.AdmCmdErrorException: /opt/ds6/bin/dsadm create -
p 3998 -P 3999 --pwd-file /var/tmp/ads47762.tmp /opt/var/dscc6/dcc/ads
at com.sun.directory.common.slapx.AdmCmd.run(AdmCmd.java:84)
at com.sun.directory.common.slapx.AdmCmd.run(AdmCmd.java:51)
at com.sun.directory.dcc.ads.ADSInstall.createADSInstance(ADSInstall.jav
a:628)
at com.sun.directory.dcc.ads.ADSInstall.create(ADSInstall.java:249)
at com.sun.directory.dcc.cli.setup.CmdAdsCreate.performCreate(CmdAdsCrea
te.java:129)
at com.sun.directory.dcc.cli.setup.CmdAdsCreate.perform(CmdAdsCreate.jav
a:59)
at com.sun.directory.clip.ClipSubcommand.execute(ClipSubcommand.java:89)
at com.sun.directory.clip.FriendlySubcommand.execute(FriendlySubcommand.
java:55)
at com.sun.directory.clip.ClipParser.execute(ClipParser.java:196)
at com.sun.directory.dcc.cli.setup.SetupMain.main(SetupMain.java:30)
Sofware installation is probably incomplete or corrupted
・アプリケーションサーバーインスタンスを作成
# mkdir /opt/domain-root
# export AS_DOMAINS_ROOT=/opt/domain-root
# cd /opt/SUNWappserver
# ./asadmin create-domain --domaindir /opt/domain-root --adminport 3737 --adminuser boss dscc
管理パスワードを入力してください>
管理パスワードをもう一度入力してください>
マスターパスワードを入力してください [デフォルトを使用する場合は Enter キー]:>
マスターパスワードを再度入力してください [デフォルトを使用する場合は Enter キー]:>
Admin のポート 3737 を使用しています。
HTTP Instance のデフォルトポート 8080 を使用しています。
JMS のデフォルトポート 7676 を使用しています。
IIOP のデフォルトポート 3700 を使用しています。
HTTP_SSL のデフォルトポート 8181 を使用しています。
IIOP_SSL のデフォルトポート 3820 を使用しています。
IIOP_MUTUALAUTH のデフォルトポート 3920 を使用しています。
JMX_ADMIN のデフォルトポート 8686 を使用しています。
設定ファイルの変数 AS_ADMIN_PROFILE による の指定どおりにプロファイル enterpriseを使用してドメインを作成しています。
指定されたロケール [ja_JP] のファイルが [/opt/SUNWappserver/lib/install/templates/locales/ja_JP/index.html] に見つかりませんでした。デフォルト (en_US) の index.html を使用します。
使用するセキュリティーストア: NSS
ドメイン dscc が作成されました。
・server.policy ファイルを編集
# vi /opt/domain-root/dscc/config/server.policy
次の文を、ファイルの末尾に追加。
// Permissions for Directory Service Control Center
grant codeBase "file:${com.sun.aas.instanceRoot}/applications/j2ee-modules/dscc/-"
{
permission java.security.AllPermission;
};
・アプリケーションサーバーインスタンスに WARファイルを配備
# ./asadmin start-domain --domaindir /opt/domain-root --user boss dscc
ドメイン dscc を起動しています。お待ちください。
ログは /opt/domain-root/dscc/logs/server.log にリダイレクトされます。
管理パスワードを入力してください>
マスターパスワードを入力してください>
出力を /opt/domain-root/dscc/logs/server.log にリダイレクトしています
ドメイン dscc が起動しました。
ドメイン [dscc] はその設定で [Sun Java System Application Server 9.1_01 (build l
ocal)] を実行しています。ログは [/opt/domain-root] にあります。
管理コンソールは [https://localhost:3737] で使用できます。
"asadmin" コマンドにも同じポート [3737] を使用します。
ユーザーの Web アプリケーションは次の URL で使用できます:
[http://localhost:8080 https://localhost:8181 ]。
次の web-contexts を使用できます:
[/web1 /__wstx-services ]。
標準の JMX クライアント (JConsole など) はドメイン管理のために JMXServiceURL:
[service:jmx:rmi:///jndi/rmi://server-1:8686/jmxrmi] に接続できます。
ドメインは少なくとも次のポートで接続を待機しています:
[8080 8181 3737 3700 3820 3920 8686 ]。
ドメインはアプリケーションサーバークラスタおよびその他のスタンドアロンインスタン
スをサポートします。
# cp /opt/var/dscc6/dscc.war /opt/domain-root/dscc/autodeploy/
・DSCCにアクセス
アプリケーションサーバーの設定に応じて、http://hostname:8080/dscc または
https://hostname:8181/dsccにアクセス。
●Communication Suite 6のインストール
・解凍
# unzip SunJava_CommsInstaller_Suite6_solaris-x86.zip
・インストーラー実行
# ./commpkg install
-- LOGFILE: /tmp/CommsInstaller_20080920012702.log
CommsInstaller version 6.0-0.05 built on Wed Jul 9 22:15:55 PDT 2008
Welcome to the Communications Services Products Installer
This program will install Communications Services Products
on your computer. Do note that the installer lays down the
bits, but does not do configuration. Separate configuration
steps for each individual product will be required.
・ライセンス確認
Copyright 2008 Sun Microsystems, Inc. All rights reserved.
Use is subject to license terms.
Before you install this product, you must read and accept the
entire Software License Agreement under which this product is
licensed for your use.
The Software License Agreement will now be displayed.
Do you want to continue ? [yes] : yes
~ライセンス内容~
Enter s to skip, or Enter c to continue [c] : s
Do you agree to the license terms ? [No] : yes
・インストール場所の指定
=-=-=-=-=-=-=-=-=-=-=-=-=-=-=-=-=-=-=-=-=-=-=-=-=-=-=-=-=-=-=-=
Specify Install Location
This program will extract the server files and install them
into a directory you specify. That directory is called the
INSTALLROOT in the product documentation and will contain
the server programs.
To accept the default shown in brackets, press the Enter key.
Install location [/opt/sun/comms]: (デフォルトのまま)
・インストールする製品の選択
-=-=-=-=-=-=-=-=-=-=-=-=-=-=-=-=-=-=-=-=-=-=-=-=-=-=-=-=-=-=-=
Product Selection:
Shared Components (not shown) will be installed as required.
you will be prompted later if Shared Components need to be upgraded.
OS patches (not shown) will be installed as required.
Communication Services Products:
Item Description
---- -----------
1 Messaging Server 7.0 (7.0-0.04)
2 Messaging Server (64bit) 7.0 (7.0-0.04)
3 Comms DSsetup 6.4 (6.4-2.01)
4 Comms Delegated Administrator 6.4 (6.4-2.05)
5 Calendar Server 6.3 (6.3-9.01)
6 Instant Messaging 7.3 (7.3-03.09)
7 Communications Express 6.3 (6.3-8.01)
8 Messaging Server Sun Cluster HA agent 7.0 (7.0-0.03)
9 Calendar Server Sun Cluster HA agent 6.3 (6.3-1.01)
10 Instant Messaging Sun Cluster HA agent 7.3 (7.3-01.02)
11 Convergence 1.0 (1.0-0.44)
Enter the items you wish to install. Enter q to quit.
Prefix an item with ~ to indicate you only want
to install shared component dependencies of that product
You can enter multiple items using commas to separate them.
For example: 1,2
Please select the products you wish to install [1, 2, 3, 4, 5, 6, 7, 8, 9, 10, 11]: (デフォルトのまま)
・パッケージのアップグレード確認(NSS/NSPR/JSS)
Generating list of things to install...
Checking for Shared Component Upgrade Requirements...
Shared component NSS/NSPR/JSS has a different pkg version installed
Description: Network Security Services,Netscape Portable Runtime
Current pkg Version (SUNWjss): 4.0,REV=2004.11.05.03.05
To be installed pkg version (SUNWjss): 4.2.4,REV=2006.11.16.21.41
Product Version: 4.2.6
Note that changing pkg versions is irreversible
On the other hand, if you do not change it,
some products may not work properly
An alternative is to start over and do a multi-install using --altroot
Do you wish to change pkg versions for NSS/NSPR/JSS [n] : yes
Shared component Message Queue has a different pkg version installed
Description: Message Queue
Current pkg Version (SUNWiqr): 3.7,REV=2006.06.18.23.02
To be installed pkg version (SUNWiqr): 4.1,REV=2007.07.26.11.39
Product Version: 4.1
Note that changing pkg versions is irreversible
On the other hand, if you do not change it,
some products may not work properly
An alternative is to start over and do a multi-install using --altroot
Do you wish to change pkg versions for Message Queue [n] : yes
Service Tags has a different pkg version installed
Description: Service Tags
Current pkg Version (SUNWservicetagr): 1.0,REV=2007.05.21.20.36
To be installed pkg version (SUNWservicetagr): 1.1.4,REV=2008.03.21.07.56
Product Version: 1.1.4
Note that changing pkg versions is irreversible
Do you wish to change pkg versions for Service Tags [n] : yes
(省略)
=-=-=-=-=-=-=-=-=-=-=-=-=-=-=-=-=-=-=-=-=-=-=-=-=-=-=-=-=-=-=-=
NOTICE: To undo the installation, run the commands in:
/var/opt/CommsInstaller/logs/undoCommsInstall_20080920012702
NOTICE: silent file created in:
/var/opt/CommsInstaller/logs/silent_CommsInstaller_20080920012702
NOTICE: LOGFILE created in:
/var/opt/CommsInstaller/logs/CommsInstaller_20080920012702.log
There were 1 Warning(s). Please consult the log file
#
●Communications Suite用のDirectoryServerの設定
・DirectoryServerに新規インスタンスを作成
1.DSCCにアクセス
>アプリケーションサーバーの設定に応じて、http://hostname:8080/dscc または
>https://hostname:8181/dsccにアクセス。
2.共通操作から新規ディレクトリサーバーの作成を選択
1.DSCCにアクセス
>アプリケーションサーバーの設定に応じて、http://hostname:8080/dscc または
>https://hostname:8181/dsccにアクセス。
2.共通操作から新規ディレクトリサーバーの作成を選択
設定画面①
設定画面②
設定画面③
設定画面④
設定画面⑤
・設定用スクリプトの実行
# cd /opt/sun/comms/dssetup/sbin
# ./comm_dssetup.pl
Welcome to the Directory Server preparation tool for
Sun Java(tm) System communication services.
dssetup Version 6.4-2.01 (built Tue May 6 14:37:15 PDT 2008)
This tool prepares your directory server for use by the
communications services which include Messaging, Calendar and their components.
The logfile is /var/tmp/dssetup_20080920015119.log.
Do you want to continue [y]: y
1.DirectoryServerの場所設定
Please enter the full path to the directory where the
Directory Server instance(s) reside ("server-root"), or
an explicit Directory Server instance directory
Directory server root [/opt] : /opt/kirihari.net
Please enter the directory manager DN [cn=Directory Manager]:
Password:(DirectoryServerのパスワード)
Please enter the directory manager DN [cn=Directory Manager]:
Password: (DirectoryServerの管理パスワードを入力)
Detected DS version 6.3
Will this directory server be used for users/groups [yes]: yes
Will this directory server be used for users/groups [yes]:
WARNING: No default suffix found in the Directory
A list of suffixes are as follows:
No Suffixes Found
Please enter the Users/Groups base suffix [o=usergroup] :
There are 3 possible schema types:
1 - schema 1 for systems with iMS 5.x data
1.5 - schema 2 compatibility for systems with iMS 5.x data
that has been converted with commdirmig
2 - schema 2 native for systems using Access Manager
Please enter the Schema Type (1, 1.5, 2) [1]: 1
Please enter the DC Tree base suffix [o=internet]:
Do you want to update the schema files [yes]:
Do you want to configure new indexes [yes]:
Do you want to Reindex the new indexes now [yes]:
Here is a summary of the settings that you chose:
Server Root : /opt
Server Instance : kirihari.net
Users/Groups Directory : yes
Update Schema : yes
Schema Type : 1
DC Root : o=internet
User/Group Root : o=usergroup
Add New Indexes : yes
ReIndex New Indexes Now : yes
Directory Manager DN : cn=Directory Manager
Now ready to generate a shell script and ldif file to modify the Directory.
No changes to the Directory Server will be made this time.
Do you want to continue [y]:
(省略)
Running /var/tmp/dssetup_20080920015414.sh will make changes to the Directory
You can run this file now or at a later time
Ready to execute the script now.
Do you want to continue [y]:
(省略)
Successful Completion. Consult /var/tmp/dssetup_20080920015414.log for details
#
●MessagingServerの設定
・DNSの設定
</etc/nsswitch.confを以下のように編集>
hosts: files dns
ipnodes: files dns
</etc/hostsを以下のように編集>
192.168.0.1 ドメイン名 server-1 loghost mailhost
・セットアップの実行
# cd /opt/sun/comms/messaging/sbin/
# ./configure
GUI起動
設定画面①
設定画面②
設定画面③
設定画面④
設定画面⑤
設定画面⑥
設定画面⑦
設定画面⑧
設定画面⑨
設定画面⑩
設定画面⑪
設定画面⑫
・SSOの有効化
# /opt/sun/comms/messaging/sbin/configutil -o local.webmail.sso.uwcenabled -v 1
・MessagingServerの起動
# /opt/sun/comms/messaging/sbin/start-msg
Connecting to watcher ...
Launching watcher ... 22031
Starting store server .... 22032
Checking store server status .... ready
Starting purge server .... 22033
Starting imap server .... 22034
Starting pop server ..... 22035
Starting http server ...... 22036
Starting sched server ... 22037
Starting dispatcher server ....... 22039
Starting job_controller server ...... 22043
#
・スマートホストの設定(外部宛のメールはISPのSMTPサーバーを利用)
/opt/sun/comms/messaging/config/imta.cnfを以下のように編集
※daemon smtp.nifty.comを追加
! tcp_local
tcp_local smtp mx daemon smtp.nifty.com single_sys master_debug remotehost inner
switchchannel identnonenumeric subdirs 20 maxjobs 7 pool SMTP_POOL maytlsserver
maysaslserver saslswitchchannel tcp_auth missingrecipientpolicy 0 loopcheck
tcp-daemon
・スパム対策(Sender Policy Framework)
/opt/sun/comms/messaging/config/imta.cnfを以下のように編集
※spfmailfromを追加
! tcp_local
tcp_local smtp mx daemon smtp.nifty.com spfmailfrom single_sys master_debug remotehost inner
switchchannel identnonenumeric subdirs 20 maxjobs 7 pool SMTP_POOL maytlsserver
maysaslserver saslswitchchannel tcp_auth missingrecipientpolicy 0 loopcheck
tcp-daemon
・MTAのログ設定
/opt/sun/comms/messaging/config/imta.cnfを以下のように編集
※loggingを追加
!
! part II : channel blocks
!
defaults logging notices 1 2 4 7 copywarnpost copysendpost postheadonly noswitch
channel immnonurgent maxjobs 7 defaulthost kirihari.net kirihari.net
・設定後はMTAをコンパイル
# /opt/sun/comms/messaging/sbin/imsimta cnbuild
# /opt/sun/comms/messaging/sbin/imsimta restart
●CommunicationExpressの設定
・コンフィグツールの起動
# /opt/sun/comms/ce/sbin/config-uwc
/usr/j2se/bin/java -Djava.library.path=/opt/sun/comms/ce/lib -classpath /opt/sun
/comms/ce/lib:/usr/j2se/lib/classes.zip config-uwc -saveState /opt/sun/comms/ce/
install/saveState20080920140930
設定画面①
設定画面②
設定画面③
設定画面④
設定画面⑤
設定画面⑥
設定画面⑦
設定画面⑧
設定画面⑨
設定画面⑩
設定画面⑪
設定画面⑫
設定画面⑬
設定画面⑭
設定画面⑮
(WebServer設定)
・サーバーのルートディレクトリ:/opt/webserver7
・設定のルートディレクトリ:/opt/webserver7
・サーバーインスタンス識別子:comm-express
・仮想サーバー識別子:https-comm-express
・HTTPポート:9090
(管理インスタンス設定)
・管理サーバーポート:8989
・管理者のユーザID:admin
・管理者のパスワード:
・セキュリティ保護された~:チェック
(Webメールサーバー設定)
・Webメールサーバーのホスト名:192.168.0.1
・Webメールサーバーのポート番号:8990
※Communications Express 7.0でデフォルトポートが8990に変更になった。
・SSLの有効化
# vi /opt/sun/comms/ce/WEB-INF/config/uwcauth.properties
uwcauth.ssl.enabled=true
uwcauth.https.port=9090
・Messenger Express の local.webmail.sso.uwcport パラメータ値に、Communications Express が配備される Web Server の SSL ポート番号を設定。
# /opt/sun/comms/messaging/sbin/configutil -o local.webmail.sso.uwcport -v 9090
●システムブート時の実行例
・Cacaoの起動
# /opt/dsee6/cacao_2/usr/lib/cacao/bin/cacaoadm start
・ADSの起動
# /opt/ds6/bin/dsadm start /opt/var/dscc6/dcc/ads
・DSCCの起動
# cd /opt/SUNWappserver/bin
# ./asadmin start-domain --domaindir /opt/domain-root --user boss dscc
・インスタンスの起動
# /opt/ds6/bin/dsadm start /opt/kirihari.net/
・MessagingServerの起動
# /opt/sun/comms/messaging/sbin/start-msg
【参考1】メール保管場所の移動(MessagingServer)
・パーティションの追加(tt-data)
# cd /opt/sun/comms/messaging/bin
# ./configutil -o store.partition.tt-data.path -v /tt-data/tt-data/mailbox/
・構成反映のためリスタート
# ./stop-msg
# ./start-msg
・メールボックスを新しいパーティションに移動する(adminユーザをttdataへ移動)
# ./mboxutil -r user/admin/INBOX user/admin/INBOX ttdata
・プライマリパーティションの変更
# ./configutil -o store.partition.primary.path -v /tt-data/tt-data/mailbox/
【参考2】メールボックスのバックアップ
・全メールボックスのバックアップ
# cd /opt/sun/comms/messaging/bin
# ./imsbackup -f- /primary/user > /tt-data/tt-data/backup/mailbox/all_message_store.bak
・メールボックスのリストア(adminユーザ)
# ./imsrestore -f /tt-data/tt-data/backup/mailbox/all_message_store.bak /primary
/admin
--------------------------------------------
Tape Version : 2
Backup Date : 2008/09/27 01:50:29
Message Store : kirihari.net
Block factor : 20
--------------------------------------------
トラックバック(0)
トラックバックURL: http://kirihari.net/mt/mt-tb.cgi/10
コメントする